
Transactions
A transaction is a single real-world financial event — a purchase, a deposit, a transfer, a fee. Internally it consists of:
a date,
a free-text Description (what showed up on the statement),
two optional free-text memos (Memo 1, Memo 2 — useful for the bank’s reference numbers, locations, etc.),
and two or more splits, where each split attributes a positive or negative amount to one account.
The sum of all splits in a transaction must equal zero. This is the double-entry rule and it is what makes the books trustworthy: every dollar that moves comes from somewhere and goes somewhere.

A balanced transaction: two splits, sum zero. Note that both accounts’ balances move in the same intuitive direction (down) because their signs differ — see Accounts.
A typical purchase has two splits — one on a transaction account (the bank account or card the money came out of) and one on a planning account (the category it belongs to). Splitting a single payment across more than one category — say, a supermarket trip that was half groceries and half cleaning supplies — is just a transaction with three or more splits.
See Transfers between accounts for how to represent money being transferred between two of your accounts.
EQUITY
A split may associate an amount with the special EQUITY account. This represents a real-world event that was not foreseeable nor is it expected to repeat. For example, if something unexpectedly breaks and you need to replace it, but it does not fit into any of your existing planning accounts and you do not think it is worthwhile adding a new plan for this sort of thing since they are too unpredictable, then you can simply balance the chequing account transaction for the purchase against the EQUITY account. This will immediately be reflected as changes in the forecasts but will not otherwise affect your plans.
Of course the same applies to unexpected windfalls such as a bonus payment at work.
The Transactions tab
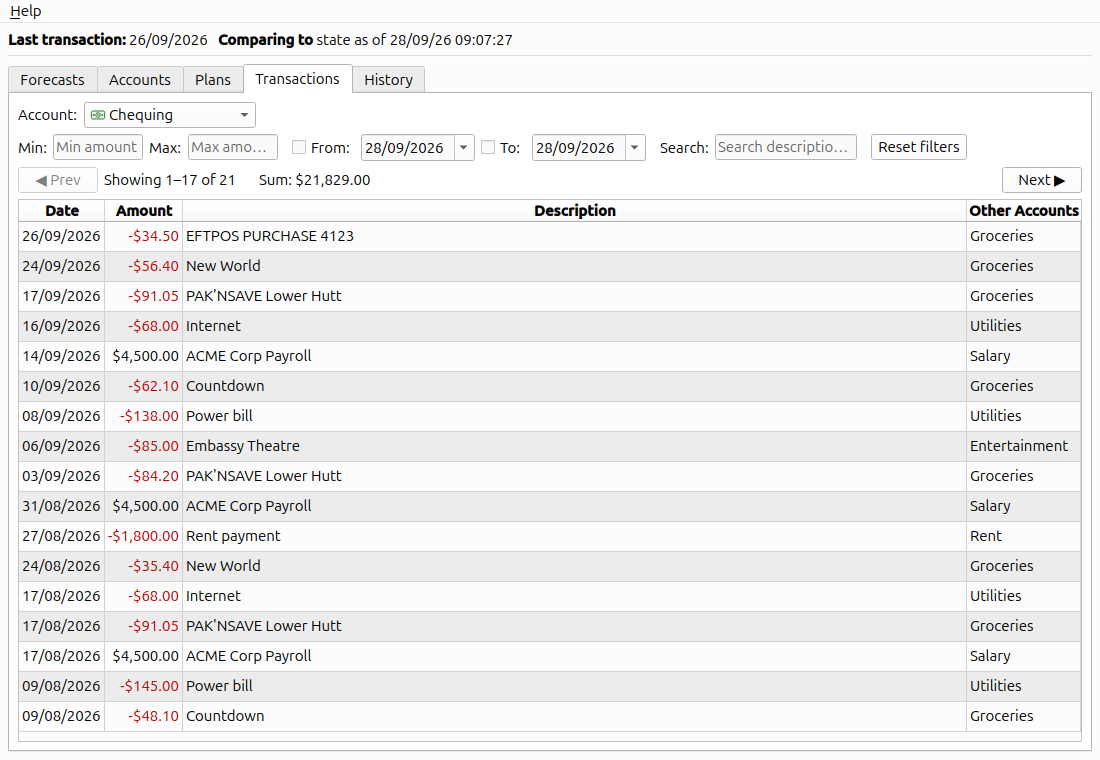
Transactions for the Chequing account, showing recent activity.
The tab shows transactions for one account at a time:
The Account dropdown at the top selects which account’s ledger you are viewing. EQUITY is included in the list.
The filter bar narrows down what is displayed: minimum and maximum amount, a date range (each end can be enabled independently), and a free text search over the Description and Memo fields.
The columns are Date, Amount (the split amount for this account, positive increases the accounts’ balance), Description, and Other Accounts (a comma-separated summary of where the rest of the money in this transaction went / came from).
Long ledgers are paginated. The Prev / Next buttons walk through the pages and the label between them shows what range you are looking at.
The Sum label totals up the amounts of all transactions matching the current filters across all pages.
The context menu (right-click a row) offers Edit (the same as double-clicking) and Delete. Deleting from this menu deletes the entire transaction (every split), not just the split for the current account.
Select several rows first — click and drag, Shift-click for a range, Ctrl-click to add single rows — and Delete removes all of them at once, after a confirmation listing what will go, and as a single undoable entry on the History tab. Edit works on one transaction at a time and is greyed out while more than one row is selected. Right-clicking a row outside the current selection selects that row first, so the menu always acts on what you see highlighted.
Importing from a CSV file
Banks usually let you download a CSV export of your account history. The CSV import workflow lets you bring those rows in as transactions in one go. To start, switch to the Accounts tab, right-click the transaction account you want to import into, and pick Import CSV….
The import is a five-step process:
Pick the file. A file dialog opens; select the
.csvyou downloaded from your bank.Map the columns. The Map CSV Columns dialog shows a preview of the first few rows and one combo per column. Tell MyBudget which column is the Date, which is the Amount, and (optionally) which to use as Description, Memo 1 and Memo 2; mark the rest as Skip. Change the Date format field to match the format your bank exports dates in. Tick Negate amounts if the file lists money going out as positive — some banks export a credit card that way, with purchases positive and payments negative. MyBudget expects money coming into the account to be positive, as on a bank account statement, and flips every amount when the box is ticked. MyBudget remembers the mapping per account, so subsequent imports for the same account reuse it automatically.
Review the rows. The Review Incoming Transactions dialog lists every parsed row. For each row, MyBudget looks for likely duplicates in the existing ledger (a transaction within ±14 days, with the same amount) and flags it; you can choose to Import or Discard the row, with a running balance preview that shows what the account balance will look like if you accept the current selection.
Confirm the balance shown matches your bank’s balance and tick the checkbox if it does. The balance is shown the way the Accounts tab shows it, so a Credit account such as a credit card reads as the positive amount owing, as on its statement.
If it does not agree, you either discarded a non-duplicate row in the CSV, included a duplicate or one of the older transactions in the ledger is wrong. One common problem that can lead to this happens when banks include transactions in the exported CSV that have been received but have not yet been finalised. Such transactions will normally be part of every export until they are finalised. Normally they will show up as duplicates and you can discard them, but if they have changed their amount, then MyBudget will not see them as possible duplicates. In this case you may need to tick the checkbox anyway, finish the import, balance, and then carefully compare the transactions for this account with your bank’s records to find out what happened.
Examples of transactions that may change amounts are transactions in foreign currency. Until these transactions are finalised, they will be included in each export with the amount calculated according to that day’s exchange rate.
Confirm. Clicking OK inserts the chosen rows into the database. Each imported row is added with a single split for the target account and no balancing split — which means every imported transaction starts out unbalanced. Balancing them is the next step.
Balancing
If any transaction is unbalanced, MyBudget hides the Forecasts and Accounts tabs and the Transactions tab switches into a special mode that lists every unbalanced transaction across the whole file:
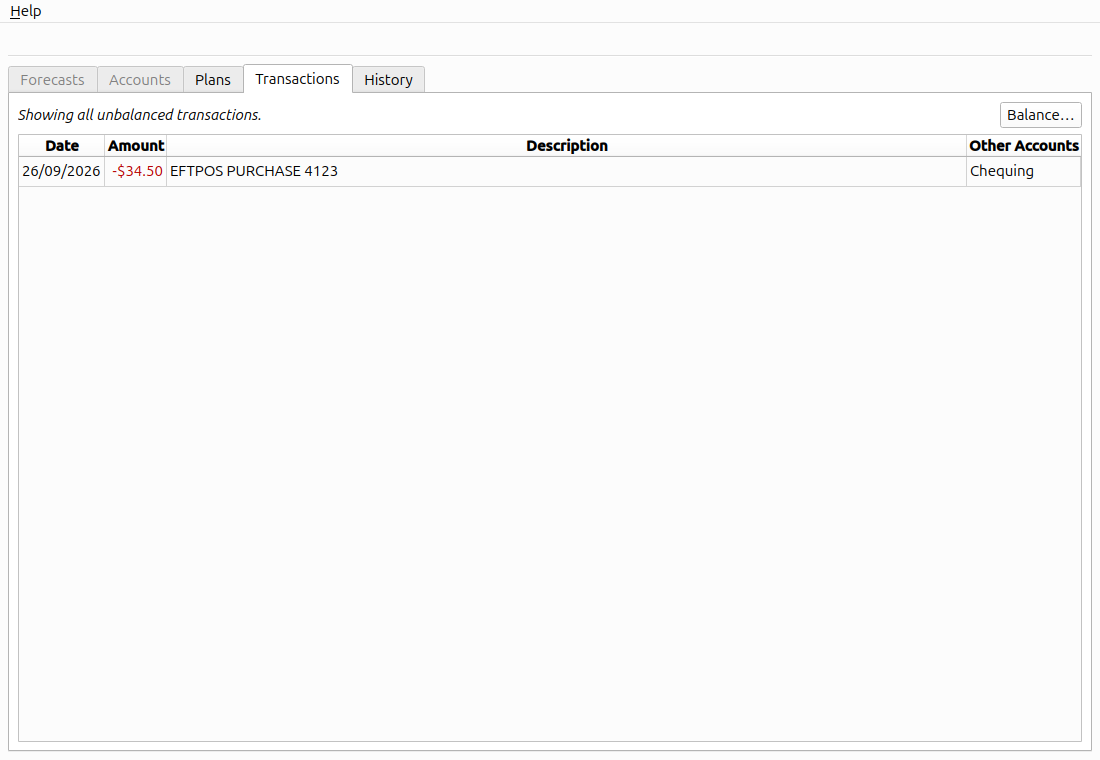
The Transactions tab in unbalanced mode. The Balance… button is the fastest way to clear the backlog.
The Balance… button (top right) opens a focused workflow that walks through each unbalanced transaction in turn — oldest first, even though the table lists them newest first. For each one the Quick Balance dialog shows the date, description and the imbalance still to be accounted for, above a short list of the planning accounts most likely to be the missing split, ranked by how well words in the description and memos match transactions you have already balanced. The accounts already on the transaction are left out of the list.
There are three ways out of that dialog:
Pick one of the suggestions — press the digit beside it (
1–9) or click it. That records a single balancing split for the whole imbalance and moves straight on to the next transaction. This is the fast path, and one keystroke per row is usually all a CSV import needs.Edit Txn — opens the full Edit Transaction dialog for that transaction. Use it when the account you want is not among the suggestions (as it will not be the first time you shop somewhere), or when the amount has to be split across several categories.
Cancel — stops the run and leaves the remaining transactions unbalanced.
When there is nothing to suggest — a description unlike anything in the ledger yet — the dialog says so and Edit Txn is the only way forward.
Once every transaction balances, the other tabs return.
Manual transactions
You don’t have to use CSV import — you can also enter transactions by hand, which is the only practical option for things like cash purchases.
Add — right-click an account on the Accounts tab and pick Add txn. The Edit Transaction dialog opens with the account pre-filled.
Edit — double-click any row on the Transactions tab, or use Edit from the context menu.
Delete — Delete from the context menu. (Removing every split from a transaction in the Edit dialog, after unlocking, has the same effect: a transaction with no splits is deleted.)
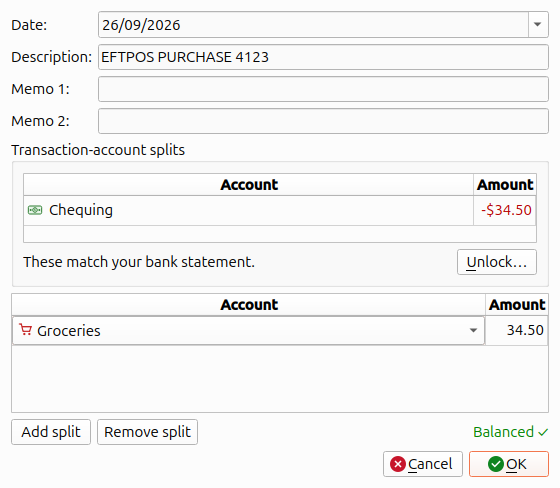
The Edit Transaction dialog. Chequing, the side that matches the bank statement, is locked; Groceries is the balancing split. The status badge in the bottom right shows Balanced ✓ (green) when the splits sum to zero, and the discrepancy in red otherwise.
In the splits table, the account combo first offers smart suggestions: MyBudget proposes accounts that have been associated with similar descriptions in the past, so a row imported as “PAK’NSAVE Lower Hutt” will typically suggest Groceries on its own if you have bought groceries there before.
If the correct account is not shown, select “(more)” and MyBudget will show all accounts as well as an option to create a new account on the fly. Its type starts out as the one a balancing split usually wants: a planning account, frozen if the transaction account is, and with the sign that makes the new split lower its balance — money spent from Chequing suggests an Expense account, money received suggests Income. The sign follows the amount already in the new split, or, while that is zero, the opposite of the transaction account’s split.
When editing an existing transaction, its splits against transaction accounts — the side that matches your bank statement — are shown separately, read-only, above the editable splits. Balancing never needs to change them: it only adds splits to planning accounts. If one really is wrong, click Unlock…; after a warning that the account will no longer agree with the bank, the splits move into the editable table. They still count towards the Balanced ✓ badge while locked. A new transaction has nothing to lock, so the account you added it on is editable from the start.